Select Page

ADD REAL PERFORMANCE TO YOUR STICK!

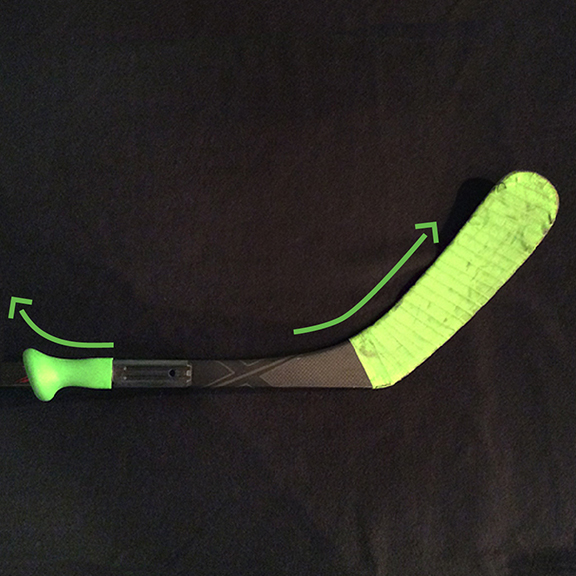
The TORCH™ is designed to increase performance for hockey players at all levels. The angle of the knob is based on how your hand moves when gripping the stick. The slope engages your palm giving you increased leverage and the slight taper on the pinky side enables increased grip on the stick for greater control. We brought together science, ergonomics and engineering to create a radical new improvement in grip technology for hockey.

The TORCH™ is an all-out performance tool that turns your stick into a natural and powerful extension of your hands. For more power, precision and performance – TORCH™ your stick. Score more.

The TORCH™ hockey knob does not fit in some sticks having concave handles. Please check your stick before buying.

U.S. Pat. D/496,541

ORDER TORCH™ HERE!
TORCH PERFORMANCE

Ergonomically Engineered

The TORCH™ Hockey Knob is designed to fit your hand, optimize grip, increase control and add serious power and leverage to your shot.

Elite Testing

We tested the TORCH™ on some of the most elite ice in the country. We listened to players, we watched every move and we created the most innovative piece of performance grip technology ever put on a hockey stick.

What's With The Green Color?

The bright green “Classic” TORCH™ was our launch color. We wanted people to see it. BUT, we got feedback from players at all levels of hockey, “I’m not getting chirped at for having that color on my twig!” So, with the launch of our complete TORCH™ line, we changed the grip to black and went with colored inserts for each different size – red for Senior, yellow for Intermediate and green for Junior.

THE TORCH PRINCIPLE

The TORCH™ increases top-hand power and leverage on your stick. It’s based on a fundamental principle which has been overlooked by stick manufacturers for decades. While the stick engineers have done a brilliant job of re-engineering the shaft and blade, we’ve been focused on the most important part of the stick – the grip. It’s where players place their strongest hand for leverage and where most shot power originates. Finally, all of that high-end technology the stick companies have been creating can now be fully engaged with the TORCH™.

EASY TO INSTALL

Installing the TORCH™ requires parental supervision. You’ll need a heat gun or hair dryer, a hack saw, miter box, hot glue gun and some paper towels. Follow these easy instructions and your stick will thank you. If you’re not comfortable installing the TORCH, ask your local  hockey retailer or skate sharpener for assistance.

Step #1 – Measure

Adjust your stick to the length you typically use. Try the TORCH™ on your stick for a while before cutting extra length off the stick. We recommend removing an additional 2 inches for the perfect fit.

Step #2 - Make The Cut

Secure the stick in a mitre box. Using a hack saw, carefully cut the shaft of the stick where you marked it. The cut should be 90º square to the length of the stick.

Step #3 - Align The TORCH™

Before you begin, align the TORCH™ so the long side of the knob is facing the same direction as the blade. Be sure to insert the TORCH™ facing the proper direction.

Step #4 – Hot Glue

Apply a generous amount of hot glue to all four sides of the black insert portion of the TORCH™. Avoid getting hot glue on the green surface of the knob.

Step #5 – Heat The Stick

Using a heat gun or hair dryer, heat the 4″ at the end of the stick. IF YOU SEE SMOKE STOP HEATING THE STICK – DO NOT TOUCH THE HANDLE!

DO NOT HEAT THE TORCH KNOB!

Step #6 – Heat The Glue

Heat the glue on the TORCH™ with the heat gun and align the slope of the TORCH™ with the blade as shown in step 3.

Step #7 - Insert The TORCH™

While the glue and stick handle are still hot, insert the aligned TORCH™ into the end of the sticks so that the green handle snuggly butts up to the end of the stick. Don’t push it so far that it buckles – if it does, pull the TORCH™ back slightly until the green portion is flat.

Step #8 - The Fit

The TORCH™ should fit flush to the end of the stick. Using a paper towel or rag, wipe off any excess glue that squeezed out when the TORCH™ was inserted. If the corners of the TORCH™ are slightly raised, simply apply some athletic tape to cover the transition.

Step #9 - Tape It

Now you’ve got the TORCH™ firmly installed on your stick, using TORCH™ green athletic tape, tape it up the way you always set up your stick. Get out on the ice and experience the TORCH™ performance.

THE TORCH™ PROMISE: We built the TORCH™ to deliver real performance improvement to any stick, for any player at any level of the game. Hockey may be the toughest sport on equipment, so we engineered the TORCH™ to withstand the kind of punishment hockey dishes out. When properly affixed to your stick, the TORCH™ is guaranteed against manufacturer’s defects for 60 days from the date of your purchase. ProXR will replace a broken TORCH™ hockey knob if it breaks during regular use. Return the complete broken knob with a copy of your receipt along with a return address and we will replace your TORCH™ at no charge – limit 1 per customer. Any misuse or alterations of this product voids any and all warranties implied or otherwise stated. ProXR, LLC is not responsible for broken or damaged sticks.

Contact Us: Info@proxr.com